
CS559
Fall 2005
Lectures/Notes
Tutorials
Sample Code
Command Line Argument
Written by Yu-Chi Lai at 2005
This tutorial will introduce you to use the command arguments.
- What's Command Line Argument
- Modify Main
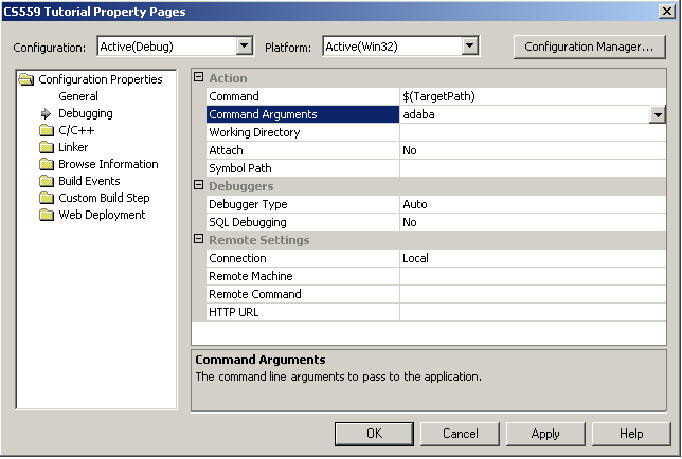
- Modify Project's Command Arguments
- Build Project
- Run the program
Lets get started.
Step 1: What's Command Line Argument
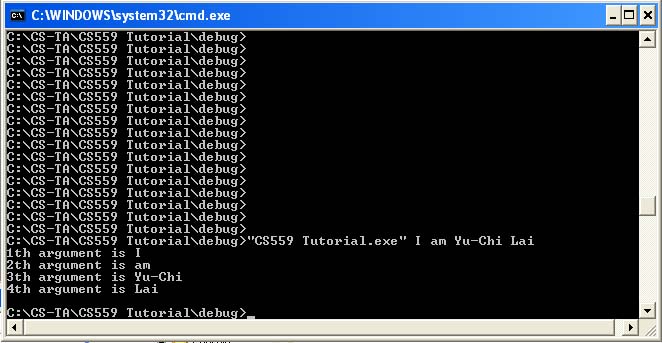
In the past DOS, we need to type in the command for executing the program instead of clicking the icon in the window system. We also need to parse in the parameters needed for the command to execute the program in the user's desired way. In window, the GUI will be used to communicate with the user. In DOS, command line arguments are used to parse in users' specified parameters. In the following figure, "C559 Tutorial.exe" is the command and I am Yu-Chi Lai is the command line arguments being parsed in.
Step 2: Modify Main
Now that we have a
window class we need to modify our main function to make use of it. Here's
the updated contents of main.cpp.
#include <iostream>
using namespace std;
int main(int argc, char** args)
{
	// Notice I start from i=1 not 0 because the args[0] is reserved
    //        for the name of this program.
	for(int i = 1; i < argc; i++)
	{
	     cerr << i << "th argument is " << args[i] << "\n";
	}
}
This new version of main go through the command argument and then print
all of them on the console.
Step 4: Build Project
We are now ready to
compile and link our program. Visual Studio calls this process
building. Before building our project we need to open another window so we
can see the results of our build attempt. Choose View -> Other Windows -> Output from the
VS03 menus. The Ouput window shows
the output from the compile and linking process. Feel free to dock or hide
this window as we will need it rather infrequently.
Choose Build -> Build Solution from the VS03
menus. This should cause some text to be placed in the output
window. If you've copied the code above correctly, you should see the
following output to the right. If the build failed you should see some
text explaining why it failed. If the error is a compiling error, you
should be able to double click on the error and the source window should update
to show you the line on which the error occured. For now we should have no
errors so we've successfully built our project and we're ready to run
it.
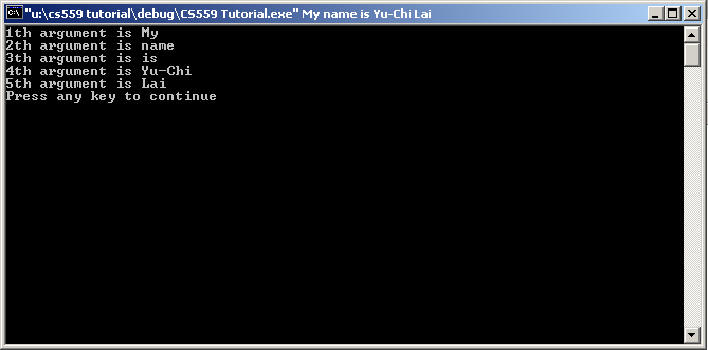
Step 5: Run the Program
To run our program from within the VS03 enviroment we simply choose Debug -> Start Without Debugging. You should see this console window appear. Congratulations! You've got your first successfull VS03 project. |
 |
Source code for this tutorial.