
main-alphatutorialphotoshop
Alpha Channel Tutorial (Adobe Photoshop)
Created by Yoh Suzuki in 2007
This tutorial will show you how to create and use an alpha channel in Adobe Photoshop.
Note: If you’re unfamiliar with pixel-pushers like Photoshop, you may want to play around with it on your own first to get used to it. If you’re lost or you run into problems, feel free to email me (yoh@cs.wisc.edu), and I’ll run you through the basics.
Also note that Photoshop doesn’t really use the alpha channel for transparency, like the program you’ll write. Photoshop will, however, let you create and play with an alpha channel, so I’ll show you how to do that. Then we’re going to write out a TGA image file that contains the alpha channel, so other programs can use it.
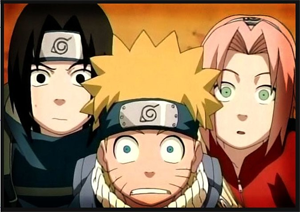
Open up the file called original.png in Adobe Photoshop.

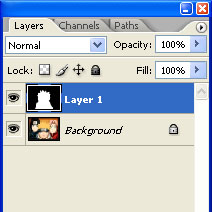
Let’s get familiar with the environment. Make sure you can see Layers (hit F7, or from the menu Windows->Layers). Notice that you have only one layer, which is called Background.
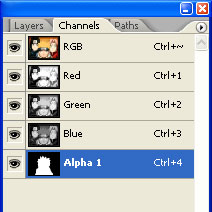
Switch over to Channels (which should be next to Layers… otherwise turn it on from the menu Windows->Channels). Notice that you have 3 channels called Red, Green, and Blue. The channel called RGB is just a shortcut to turn on all 3.
Here’s the plan. There are three characters in the image right now. We’re going to “cut out” the two characters in the background using an alpha layer, leaving only the middle character in the image. Ready?
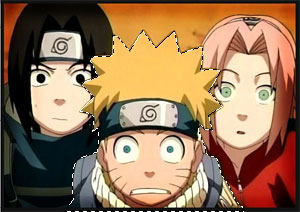
Go back to Layers. Use your favorite selection tool (I recommend either the Polygonal Lasso or the Magnetic Lasso) to select the character in the middle.
Create a new layer while you still have the middle character selected (Shift-Ctrl-N, or from the menu Layer->New->Layer).
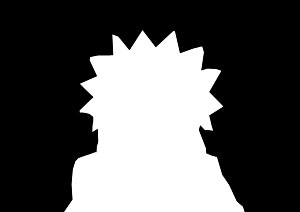
Make sure that your active layer is the new layer you just created. We want to fill the inside of the selection with white, and the outside with black. You can do this by using the Paint Bucket Tool (sometimes hidden behind the Gradient Tool; switch between them with Shift-G). Make sure your active color is white, and fill inside the selection. Then invert the selection (Shift-Ctrl-I, or from the menu Select->Inverse) so you’re selecting outside of the character. Change your active color to black. Fill the outside with black. When you’re done, you can stop selecting so the blinking selection line goes away.
We’re almost done. Make sure you’re still on the black & white layer you just created, and select the whole image (Ctrl-A, or from the menu Select->All). Copy the image (Ctrl-C or from the menu, Edit->Copy).
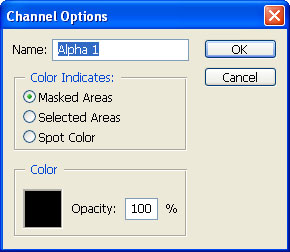
We don’t have an alpha channel yet. Switch to Channels. Create a new channel by clicking the button called “Create new channel” at the bottom of Channels. It should create a channel called Alpha 1. Select this channel. Paste your image into this channel (Ctrl-V or from the menu, Edit->Paste). Double-click on the channel to change the settings. Make sure that the color indicates Masked Areas, with the color black and the opacity 100%.
Switch to Layers and delete the black & white layer, because we don’t need it anymore.
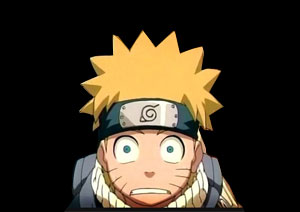
Switch to Channels. Turn on all of the channels (which means you see the “eye” icon next to each channel). Now you should see just the middle character, without his two friends.
One last thing. When you save this file… You’ll want to choose to Save As, and save it as a TGA (and make sure you include the alpha channel when it asks you, with 32 bits/pixel).
- y