
main-tutorialvs08
Adapted from Stephen J. Chenney’s Tutorial
Modified by Yu-Chi Lai in 2005
Modified by Yoh in 2007 (updated for VS05)
Modified by Eilbert in 2009 (updated for VS08)
This tutorial will introduce you to VS08 and walk you through thecreation of the classic Hello World program. There are five simplesteps to this tutorial.
Lets get started.
1.@ Getting Visual Studio 2008
One option for using Visual Studio is to work in one of the Windows labs in the CS building. If you prefer to work at home, and you would like an install DVD for VS08, contact Subhadip. Otherwise, if you have plenty of bandwidth (and patience), you can get VS08 on DreamSpark but you’ll need to have (or set up) a Windows Live account. Alternatively, and also requiring high bandwidth, you can sign up for MSDNAA (contact CSL about getting an account). If you go this route, also make sure to update to Service Pack 1.
2.@ Create a Console Project
- Choose File -> New -> Project from the VS08 menus. You should get this dialog box.
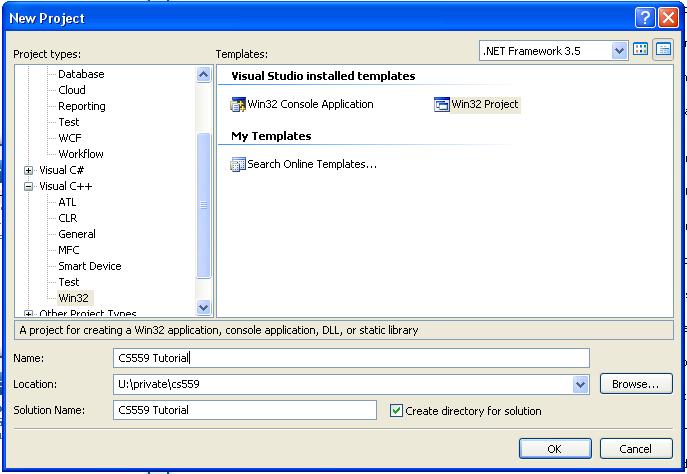
- We wish to create a Win32 Project (chosen from the templates on the left side).
- Set the location to someplace on your U drive and give the project a name, in this case CS559 Tutorial.
- Click OK.
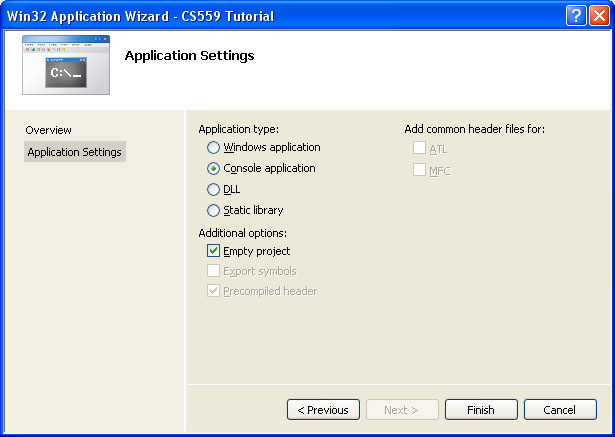
- Go to the Application Settings tab.
- Make sure Console application and Empty project and selected.
- Click Finish.
3.@ Add New Source File
- Right click on our project CS559 Tutorial at solution explorer and choose Add->New Item.
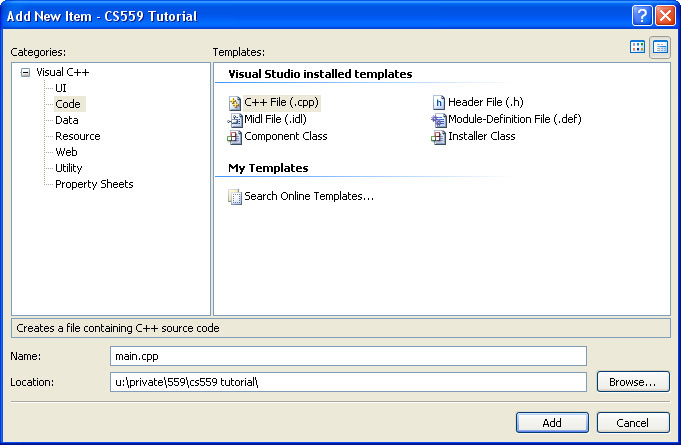
- We want a C++ source file so choose the Code category and C++ File (.cpp) from the available templates.
- Enter a name for our source file, main.cpp in our case. The location should already be under the project you’ve created.
- Click Add.
- You should now see a blank source file in the editor titled main.cpp.
- Lets add a window to VS08 to make navigating our project easier. From the View menu choose Solution Explorer. All windows in VS08 can be docked or hidden as you’d like so feel free to drag this new windows to a location that is accessible but does not block your view of the main source window.
- The Solution Explorer shows you a tree representing your current solution. Solutions are made of one or more projects, which in turn are composed of one or more files. We currently have one project in our solution, namely CS559 Tutorial. Which currently has a single file main.cpp under Source Files.
4.@ Add Code
- We are now ready to add some actual code to our program. Enter (or cut and paste) the following code into main.cpp which should already be open in the main source window.
#includeusing namespace std; int main(int argc, char** args) { cerr << "Hello World" << endl; return 0; }
- I’m not going to explain this code as you are expected to have a working understanding of C++ for this (and all future) tutorials.
- Our project is very simple. We have but a single function currently so it is easy to find the code we want. However, the projects for 559 can become rather large and finding that one function you want to modify may not be so easy. Let’s take a look at another VS08 window that can help us. Choose View -> Class View to get the Class View window. (This view replaces the Solution Explorer view. To return to the Solution Explorer, just choose View -> Solution Explorer again.) The Class View window shows our project as a tree. However, the Class View window breaks the project up by class and function rather than by file. Right now we have only a single function main but later your projects will grow to multiple classes each containing many functions. The Class View window will prove invaluable when navigating such projects later in the course.
5.@ Set Intermediate Directory (Optional)
There may be some issues with VS08 and AFS (the unified file system used by the department). VS08 creates some temporary files when compiling programs and AFS is currently preventing this from happening. So to remedy this situation we’re going to have VS08 put the temporary files on the local drive. These files will be lost when you logout but they’re only temporary files anyway so that’s ok.
- Open the Class View window, right click on our project CS559 Tutorial and choose Properties. Select General from the left hand pane and set the Intermediate Directory to C:\Temp\Debug.
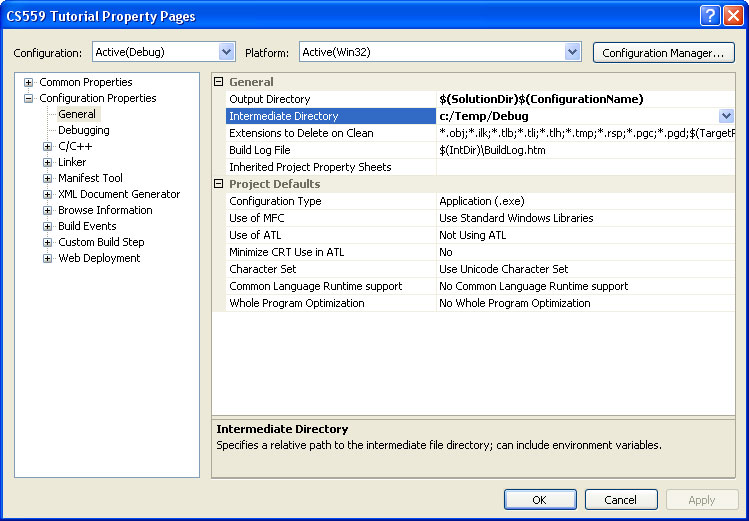
- The intermediate directory will have to be set in this manner for all projects you create in VS08.
- Click OK and we’re all set to compile our project.
6.@ Build Project
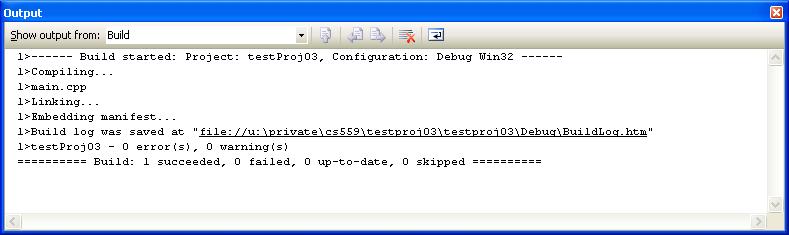
- We are now ready to compile and link our program. Visual Studio calls this process building. Before building our project we need to see the results of our build attempt. The output from the compile and linking process is shown in the Output window (Refer the figure below, you will find this in the lower part of your window). Feel free to dock or hide this window as we will need it rather infrequently.
- Choose Build -> Build Solution from the VS08 menus. This should cause some text to be placed in the output window. If you’ve copied the code above correctly, you should see the following output.
- If the build failed you should see some text explaining why it failed. If the error is a compiling error, you should be able to double click on the error and the source window should update to show you the line on which the error occurred. For now we should have no errors so we’ve successfully built our project and we’re ready to run it.
7.@ Run the Program
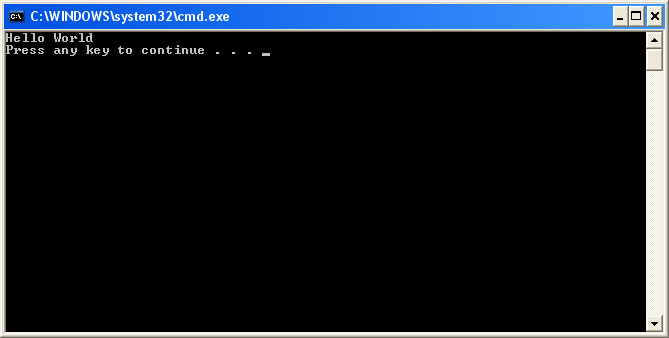
- To run our program from within the VS08 environment we simply choose Debug -> Start Without Debugging. You should see this console window appear. Congratulations! You’ve got your first successful VS08 project.